
A beautiful, bright, show-stopping, delicious Rainbow Birthday Cake with Sprinkles. Nothing beats slicing into this cake and seeing the vibrant colors of the rainbow! This cake is perfect for birthdays and other special occasions!

Jump to:
This decadent and vivid Rainbow Birthday Cake is gorgeous and a crowd-pleaser!
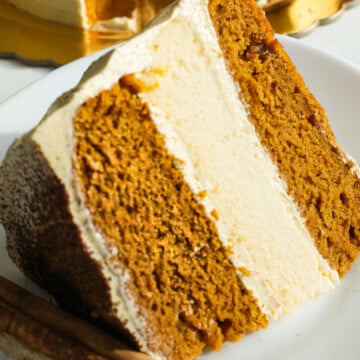
This rainbow birthday cake with sprinkles has 6 bright, colorful layers from the rainbow: Red, orange, yellow, green, blue, and violet. The acronym ROYGBIV (red, orange, yellow, green, blue, indigo, and violet) is useful to remember the order of the rainbow colors. As indigo and violet are fairly similar, you can skip them. To decorate this rainbow birthday cake I add Fluffy Buttercream Frosting between each layer and frost the cake with vanilla buttercream. Then I add multi-colored sprinkles to the entire body of the cake and use a piping bag and star nozzle to create swirls around the rim of the cake.
If you are a fan of sprinkles, you will love this Old-School Birthday Sprinkle Cake! For more colorful and themed cakes, try my Mini Egg Easter Drip Cake, Easy Mango Passionfruit Cake and Japanese Matcha Cake with Strawberries and Cream.
Why You Should Try This Recipe
- Every time I make this rainbow birthday cake with sprinkles I see the delight in people's faces when they get their first slice. It brings life to the phrase "Taste the rainbow "
- This rainbow birthday cake with sprinkles always adds excitement to special occasions!
- This is a super easy rainbow birthday cake with sprinkles recipe for a colorful, kid-friendly cake-and trust me, there will be no leftovers!
- Feel free to experiment with this bright cake's frosting-you can try chocolate, strawberry, or any other flavor you wish. You may always use white flour or GF flour in place of self-raising flour.
- Every bite of this rainbow birthday cake with sprinkles is indulging!
- Design this rainbow birthday cake however you like. For example, frost it with vanilla buttercream or Easy Milk Chocolate Ganache.
Ingredients

This rainbow birthday cake with sprinkles recipe uses easy-to-find ingredients that can be bought from a local store if you don't already have them in your pantry. Read the Recipe Card for the measurements.
For Rainbow Cake
This is a 6" cake with 6 layers of vanilla sponge. This vanilla sponge is made with butter using the creaming method. All ingredients should be at room temperature and all dry ingredients should be sifted (poured through a sieve) before baking.
- Unsalted butter: I have used unsalted butter. Any local brand works. Ensure the butter is at room temperature when you start with steps.
- Caster sugar: is finer than granulated sugar and dissolves easily with melted butter.
- Vanilla extract: I prefer using vanilla extract over essence as the extract adds a strong aroma and flavor to this rainbow birthday cake with sprinkles.
- Eggs: Eggs add natural structure and moisture to this cake, helping create a fluffy and soft cake. Make sure they are at room temp.
- Self-raising flour: Sift the flour to remove lumps.
- Milk: I have used full-fat milk and recommend using it. To make this layer cake vegan, use vegan milk or yogurt.
- ⅛-1/4 teaspoon of red, orange, yellow, green, blue, and violet food coloring gel. Each gel is of rainbow color.

- Unsalted butter: Use room-temperature butter to achieve the best texture.
- Icing sugar: Sift the sugar to remove lumps.
- Vanilla extract: For sweetness.
- Sprinkles: Any local good brand will work.
Tips and Substitutions
- Cake tins: This rainbow birthday cake with sprinkles is tall as I used 6″ cake tins. You can also use 7″ tins or 8″ tins. However, be aware that the cake layers will be thinner.
- Different proportions: You can double or triple this rainbow birthday cake recipe, depending on how many people you feed. If you want to make a smaller amount, the cake layers will be thinner, and this can sometimes be difficult to decorate.
- Ingredients: Make sure that all of the ingredients are at room temperature. Sift all of the dry ingredients before mixing.
- Overmixing batter: Do not overmix the batter because the cake will become tough.
- Baking: Cakes should be baked on the middle shelf. Baking cakes on the top shelf can result in dry burnt cakes and baking cakes on the bottom shelf can take longer. Add cakes to the oven as soon as possible for the best results. Also, do not open the oven in the first 20 minutes of baking. If you don't have space for 6 tins in your oven then you can half the recipe below and make three cakes first and then bake the remaining three.
- Moisture: If you want to add more moisture to the cake, heat a 1:1 ratio of water and sugar in a saucepan to create a syrup. Bring to a boil, simmer for 10 minutes, and leave to cool.
- Different ways to decorate: You can decorate this rainbow birthday cake in many ways. If you want a simple look, skip the sprinkles and frost the cake with vanilla buttercream or unicorn style. You can also add chocolate drips or use rainbow-colored buttercream!
How to Make Rainbow Birthday Cake with Sprinkles
This rainbow birthday cake is bright, fun, and delicious! The steps below will guide you through making a rainbow birthday cake from scratch.

- Preheat the oven to 160C/320F/Gas mark 3. If necessary, grease six non-stick 6″ cake tins with butter or oil and line them with baking paper.
- In a large bowl, add room-temperature butter to a large glass bowl.
- Add sugar to the butter and beat for 3-5 minutes or until pale. Mix vanilla extract into the butter-sugar mixture.
- To this, add an egg and mix well until the egg is not visible.
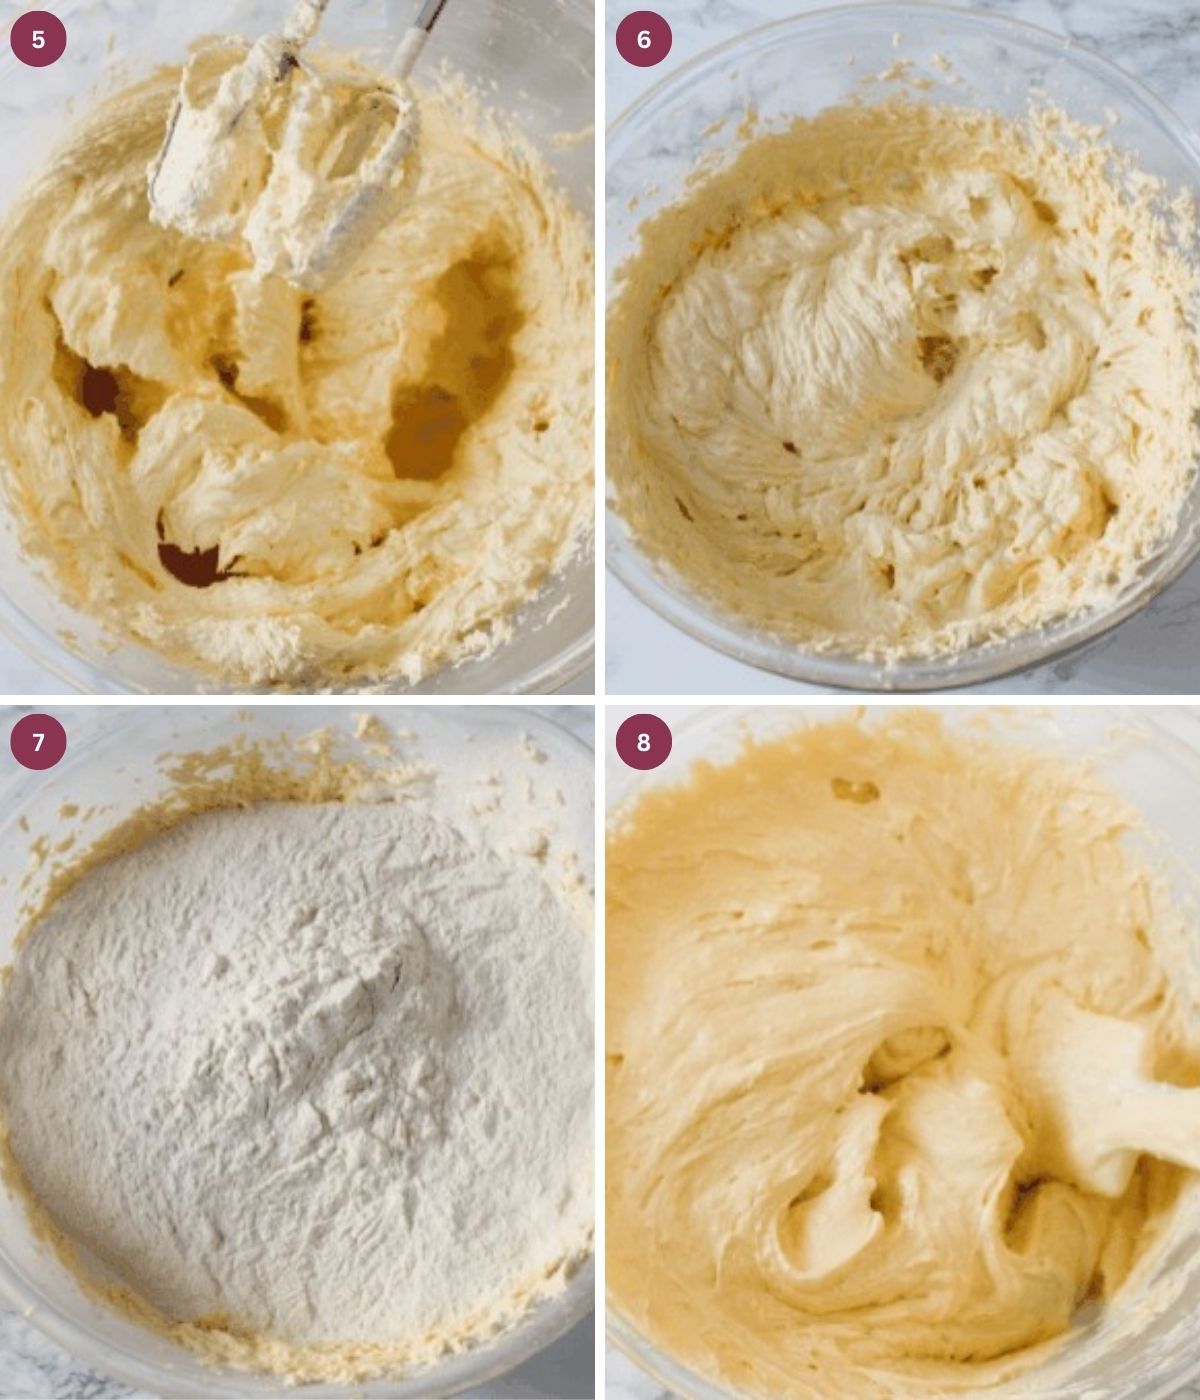
- Continue to add eggs.
- Whisk until they are no longer visible.
- Add half of the sifted self-raising flour and milk to the mixture mix.
- Add the rest of the self-raising flour and milk, then mix again. Do not overmix the cake batter; you still need to mix in food coloring. Overmixing will result in a tough cake.

- Use a weighing scale to separate the batter evenly.
- Add red, orange, yellow, and green coloring to each bowl and mix until incorporated.
- Do not overmix.
- Use gel colors for a more vibrant shade.

- Add blue and violet food coloring to the remaining bowls.
- Add each colored cake batter into the greased tins and bake for 30 minutes or until done.
- To test if your cake is ready, stick a knife into it. If it comes out clean, it is done, but if it is wet with cake batter, it's not ready. Once the cakes are prepared, leave them to cool completely on a cooling rack before decorating. As you can see from the image above, not all cakes appear to be the right color. Don't worry. This is perfectly normal because most cakes get burnt on the outside. All you need to do is use a knife to shave off the burnt bits and the color will come through.
Prep Easy Vanilla Buttercream
Grab another bowl and add room-temperature unsalted butter. Whisk on a low speed for 1 minute. Then add some sifted icing sugar and whisk on medium speed for 3 minutes. Add the remaining sifted icing sugar, vanilla extract, and double cream. Whisk for 3-5 minutes or until spreadable. You can use my Best White Chocolate Buttercream or Whipped White Chocolate Ganache to frost the cake instead.
Assemble The Rainbow Birthday Cake

Stack the cakes in the correct order once it's time to decorate.
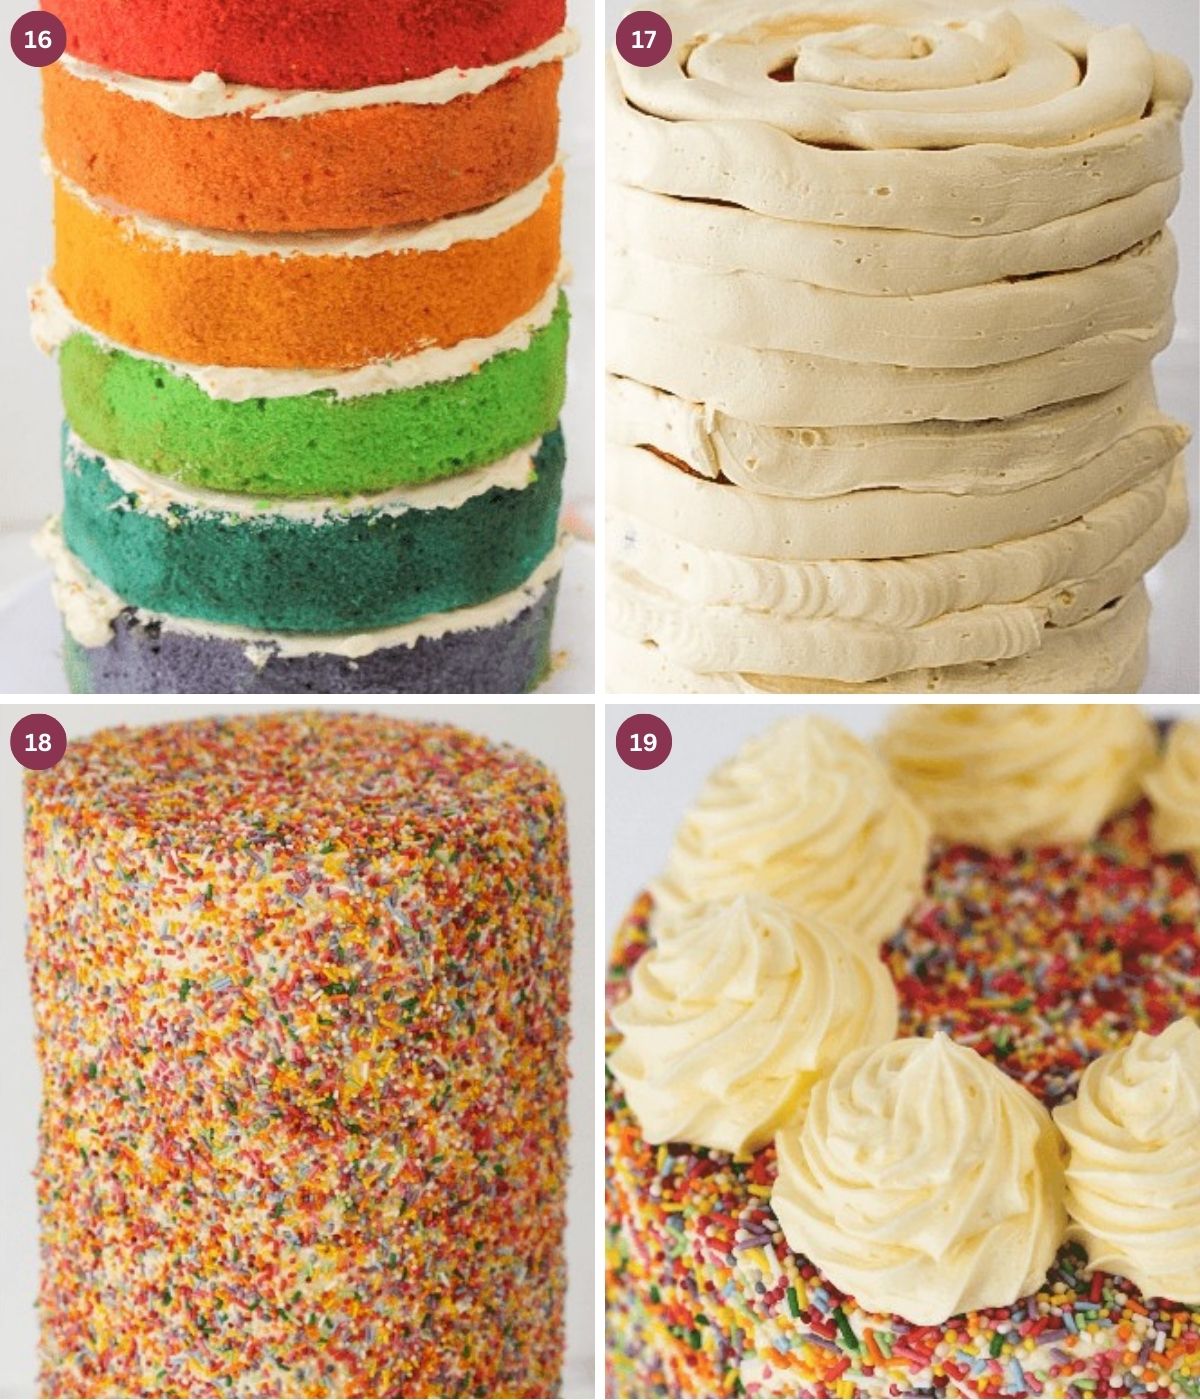
- Add buttercream to the center of an 8″ cake board. Then, place the violet cake on the board-the option to add homemade syrup to the cake to keep it moist. Then add buttercream. Repeat this step for the rest of the cakes.
- Then add buttercream to a piping bag and cover the cake in buttercream. Use a smoother to smooth the cake and refrigerate for 30 minutes.
- Cover the cake in rainbow sprinkles.
- Then, pipe fresh buttercream around the top of the cake, as shown in image 19.
Syrup Recipe (optional): Heat a 1:1 ratio of water and sugar in a saucepan to create a syrup. Bring to a boil, simmer for 10 minutes and leave to cool. This helps the cake to stay moist.
20. Serve the show-stopping rainbow birthday cake! Cut into the cake, take your first slice, and admire the beautiful rainbow colors!

Recipe FAQS
1. Grease 6 non-stick cake tins.
2. Grab a large bowl. Add unsalted butter and caster sugar and whisk for 3-5 minutes or until pale yellow.
3. Add eggs and vanilla extract to the bowl and whisk again.
4. Then add self-raising flour, milk and mix.
5. Add equal amounts of the cake batter to 6 different bowls.
6. Add ⅛ to ¼ of red food coloring to one of the bowls with cake batter and stir until well combined. Repeat this step with the orange, yellow, green, blue, and violet food coloring.
7. Finally, bake the cakes at 160C/320F for 30 minutes or until done.
Add gel-based food coloring to the cake batter. Make sure the food coloring and cake batter are well combined before baking.
Rainbow cake is made of layers of vanilla cake colored with food coloring.
If you have any leftovers wrap tightly with plastic or foil and refrigerate for up to 4 days. It can also be frozen in foil for up to three months.
More Luscious Cake Recipes


Rainbow Birthday Cake with Sprinkles
Equipment
- 1 6" cake tins
- 1 Electric whisk or stand mix
Ingredients
Rainbow Cake
- 700 g unsalted butter room temperature
- 700 g caster sugar sifted
- 2 teaspoon vanilla extract
- 700 g eggs room temperature
- 700 g self-raising flour sifted
- 5 tablespoon milk room temperature
- ⅛-1/4 teaspoon of red, orange, yellow, green, blue, violet food colouring gel
How to Make Buttercream
- 900 g unsalted butter room temperature
- 1700 g icing sugar sifted
- 2 teaspoon vanilla extract
- ½ to ¾ cup of double cream
How to Assemble the Rainbow Cake
- 3-5 cups multi colored sprinkles
Instructions
- Preheat the oven to 160C/320F/Gas mark 3. Start by greasing 6 non-stick 6" cake tins with butter or oil and line them with baking paper if necessary.
- Next, add 700g of room temperature butter to a large bowl.
- Add 700g of sifted caster sugar.
- Whisk for 3-5 minutes or until pale yellow.
- Add 1 teaspoon of vanilla extract to the mixture. Then measure 700g of room temperature eggs. Add one into the bowl and whisk until the egg is no longer visible. Repeat the previous step for the remaining eggs. The mixture should look smooth and silky.
- Add 350g of sifted self-raising flour to the mixture and 2-3 tablespoon of room temperature milk and mix. Repeat the previous step with the remaining 350g of self-raising flour and milk then mix.
- You will need red, orange, yellow, green, blue and violet food coloring. Add equal amounts of the cake batter to six different bowls and add ⅛-1/4 teaspoon of each food coloring and mix until well combined.
- Add each colored cake batter into the greased 6" tins and bake for 30 minutes or until done. To test if your cake is ready stick a knife into the cake. If it comes out clean then it is done but if it is wet with cake batter then it's not ready. Once the cakes are ready leave them to cool completely on a cooling rack before decorating.
How to Make Buttercream
- Add 900 g of room temperature unsalted butter to a large bowl and whisk on a low speed for 1 minute. Then add 850 g of the sifted icing sugar and whisk on a medium speed for 3 minutes.
How to Assemble the Rainbow Cake
- Make sure you stack the cakes in the correctorder once it's time to decorate.
- Add buttercream ½ a tablespoon of buttercream to the center of an 8" cake board. Then place the violet cake on the board. Option to add homemade syrup to the cake to keep it moist. (see notes). Then add buttercream. Repeat this step for the rest of the cakes.
- Then add buttercream to a piping bag and cover the cake in buttercream. Use a smoother to smooth the cake. Then refrigerate the cake for 30 minutes.
- Next, you have the option to add a second layer of buttercream or skip this and add sprinkles to the entire body of the cake using your hands or a spoon.
- Finally, add a star nozzle to a piping bag, add buttercream and add swirls around the rim of the cake.
- Now get ready to serve this show-stopping rainbow birthday cake with sprinkles! Cut into the cake, take your first slice and admire the beautiful rainbow colors!
Notes
- Cake tins: This cake is tall as I used 6″ cake tins. You can also use 7″ tins or 8″ tins. However, be aware that the cake layers will be thinner.
- Different proportions: You can double or triple this recipe depending on how many people you need to feed. If you want to make a smaller amount then be aware that the cake layers will be thinner and this can sometimes be difficult to decorate.
- Ingredients: Make sure that all of the ingredients are room temperature. Sift all of the dry ingredients before mixing.
- Overmixing batter: Do not overmix the batter because the cake will become tough.
- Baking: Cakes should be baked on the middle shelf. Baking cakes on the top shelf can result in dry burnt cakes and baking cakes on the bottom shelf can take longer. Add cakes to the oven as soon as possible for the best results. Also, do not open the oven in the first 20 minutes of baking.
- Moisture: If you want to add more moisture to the cake then heat a 1:1 ratio of water and sugar in a saucepan to create a syrup. Bring to a boil, simmer for 10 minutes and leave to cool.
- Different ways to decorate: You can decorate this cake in lots of different ways. If you want a simple look then skip the sprinkles and frost the cake with vanilla buttercream. You can also add chocolate drip or use rainbow-colored buttercream!


Allyssa says
Super easy to make rainbow layer cake and with a cute sprinkles! It taste amazing too! Fam really loves it! Thanks for sharing!
Heidy Linn says
I was a little intimidated when I saw this recipe on Pinterest--but after coming to your blog and using the interactions to the letter, this rainbow layer cake with sprinkles was easy and turned out stunning. Everyone loved it.
Kathryn says
This is such a gorgeous cake! I love all of the colorful layers, I cannot wait to try this.
Farrukh Aziz says
I love how simple this was to make, and so good at the end! The buttercream was delicious! I'm surely making this again!
Sandhya Ramakrishnan says
I have always wanted to make a rainbow cake and this is going to be my project this summer with my boys. Love the idea of using sprinkles to decorate as it is so easy for beginner like me. Thanks for the recipe and tips.
kushigalu says
Wow. I would love to make this rainbow cake for my lil one. He would love this. Thanks for sharing detailed recipe.
Amy Liu Dong says
This Rainbow Cake is so beautiful and definitely delicious.
Thanks for sharing your step-by-step procedure on making it.
Lori | The Kitchen Whisperer says
Oh how fun, colorful and festive! Seriously, this brought such a HUGE smile to my face! I love that there are bajillion sprinkles and all the colors of the rainbow! This cake looks so scrumptious too!
Jen Sim says
Thanks Lori! It's one of my favorite cakes to make.
Alex says
Wow, this is such a showstopper! I love how bright the colors are. So perfect for a birthday party! And it looks delicious, too.
Jen Sim says
You are so right!
Natalie says
What a gorgeous cake. So fun and so summery. I bet my boys would love this cake too. I will save this recipe and make it for our next garden family party. Thanks.
Michelle Huston says
My granddaughter's would love this. Putting it on my must make list, now. Thanks for sharing!
Audrey says
Beautiful, fun and the instructions you gave made this not seem so intimidating to bake!
Marcellina says
This sure is a show stopper!! At first it looks intimidating but your clear and concise instructions and tips make this cake completely doable! Great recipe!
Lillian says
This cake is so beautiful. I can't wait to try it as a pride month recipe!
Jere Cassidy says
What an amazing cake and really so simple to make. This is definitely a showstopper.
Nora says
I love this cake! It's so colorful and sound super delicious! Have to try this one out for my daughters' birthday! Thanks for sharing!
Sunrita says
Just love rainbow cakes. They are great. Yours looks stunning. You must have made few people really jealous ?
Eleanor says
I made this rainbow layer cake with sprinkles for my daughter's birthday party, and it was a hit with both kids and adults. Everyone loved the colorful layers and sprinkles, and the cake was gone in no time.
Jen Sim says
Hi Eleanor, Thanks for the feedback. I am so happy to hear that the cake was hit! 🙂